Are you looking to unlock the full potential of your Raspberry Pi by accessing it remotely? Whether you're a hobbyist, developer, or tech enthusiast, learning how to connect to Raspberry Pi using remote.it can revolutionize the way you interact with your device. Remote.it offers a seamless, secure, and efficient way to access your Raspberry Pi from anywhere in the world, eliminating the need for complex network configurations. This guide will walk you through everything you need to know, from setting up remote.it to troubleshooting common issues, ensuring you can harness the power of remote access with ease.
Remote.it is a versatile tool designed to simplify remote connectivity. By leveraging this platform, you can bypass the limitations of traditional methods like SSH or VNC, which often require port forwarding or static IPs. Instead, remote.it provides a user-friendly interface and robust security features, making it an ideal choice for beginners and experts alike. In this article, we’ll delve into the step-by-step process of connecting to your Raspberry Pi using remote.it, explore its advantages, and address common queries to ensure you’re equipped with all the knowledge you need.
As we progress, you’ll discover how remote.it can enhance your projects, from IoT applications to server management. By the end of this guide, you’ll not only understand the technical aspects of remote access but also appreciate the convenience and flexibility it brings to your Raspberry Pi experience. So, let’s dive in and explore how to connect to Raspberry Pi using remote.it, ensuring you stay connected no matter where you are.
Table of Contents
- What is Remote.it and Why Use It?
- How to Install Remote.it on Raspberry Pi?
- Step-by-Step Guide: How to Connect to Raspberry Pi Using Remote.it?
- What Are the Advantages of Using Remote.it for Raspberry Pi?
- How Secure Is Remote.it for Remote Access?
- Are There Alternatives to Remote.it for Raspberry Pi?
- What Are Some Practical Use Cases for Remote.it with Raspberry Pi?
- Frequently Asked Questions About Remote.it and Raspberry Pi
What is Remote.it and Why Use It?
Remote.it is a cloud-based platform designed to simplify remote access to devices, including the Raspberry Pi. It eliminates the need for complex network configurations, such as port forwarding or static IP addresses, which are often required for traditional remote access methods like SSH or VNC. Instead, remote.it uses a secure peer-to-peer connection, ensuring that your data remains private and protected from unauthorized access.
One of the standout features of remote.it is its ease of use. Whether you’re a beginner or an experienced developer, the platform offers a user-friendly interface that makes setting up remote access a breeze. It supports multiple protocols, including SSH, VNC, HTTP, and more, allowing you to connect to your Raspberry Pi for various purposes, such as managing files, running scripts, or monitoring IoT devices.
But why should you choose remote.it over other remote access tools? The answer lies in its versatility and security. Unlike traditional methods, remote.it doesn’t require you to expose your Raspberry Pi to the public internet, reducing the risk of cyberattacks. Additionally, it works seamlessly across different networks, making it an ideal choice for users who frequently switch between locations or use dynamic IPs.
How to Install Remote.it on Raspberry Pi?
Before you can connect to your Raspberry Pi using remote.it, you’ll need to install the remote.it software on your device. The installation process is straightforward and can be completed in just a few steps. Follow the instructions below to get started:
- Update Your Raspberry Pi: Begin by ensuring your Raspberry Pi is up to date. Open the terminal and run the following commands:
sudo apt update sudo apt upgrade - Download the Remote.it Installer: Use the following command to download the remote.it installer script:
curl -LkO https://raw.githubusercontent.com/remoteit/installer/master/scripts/auto-install.sh - Run the Installer: Execute the installer script by running:
Follow the on-screen instructions to complete the installation.sudo bash auto-install.sh - Create a Remote.it Account: If you don’t already have one, sign up for a free account at remote.it. Once registered, log in to your account and link your Raspberry Pi to your remote.it dashboard.
By the end of these steps, your Raspberry Pi will be ready for remote access via remote.it. The platform will automatically detect your device and make it available for connection through its secure network.
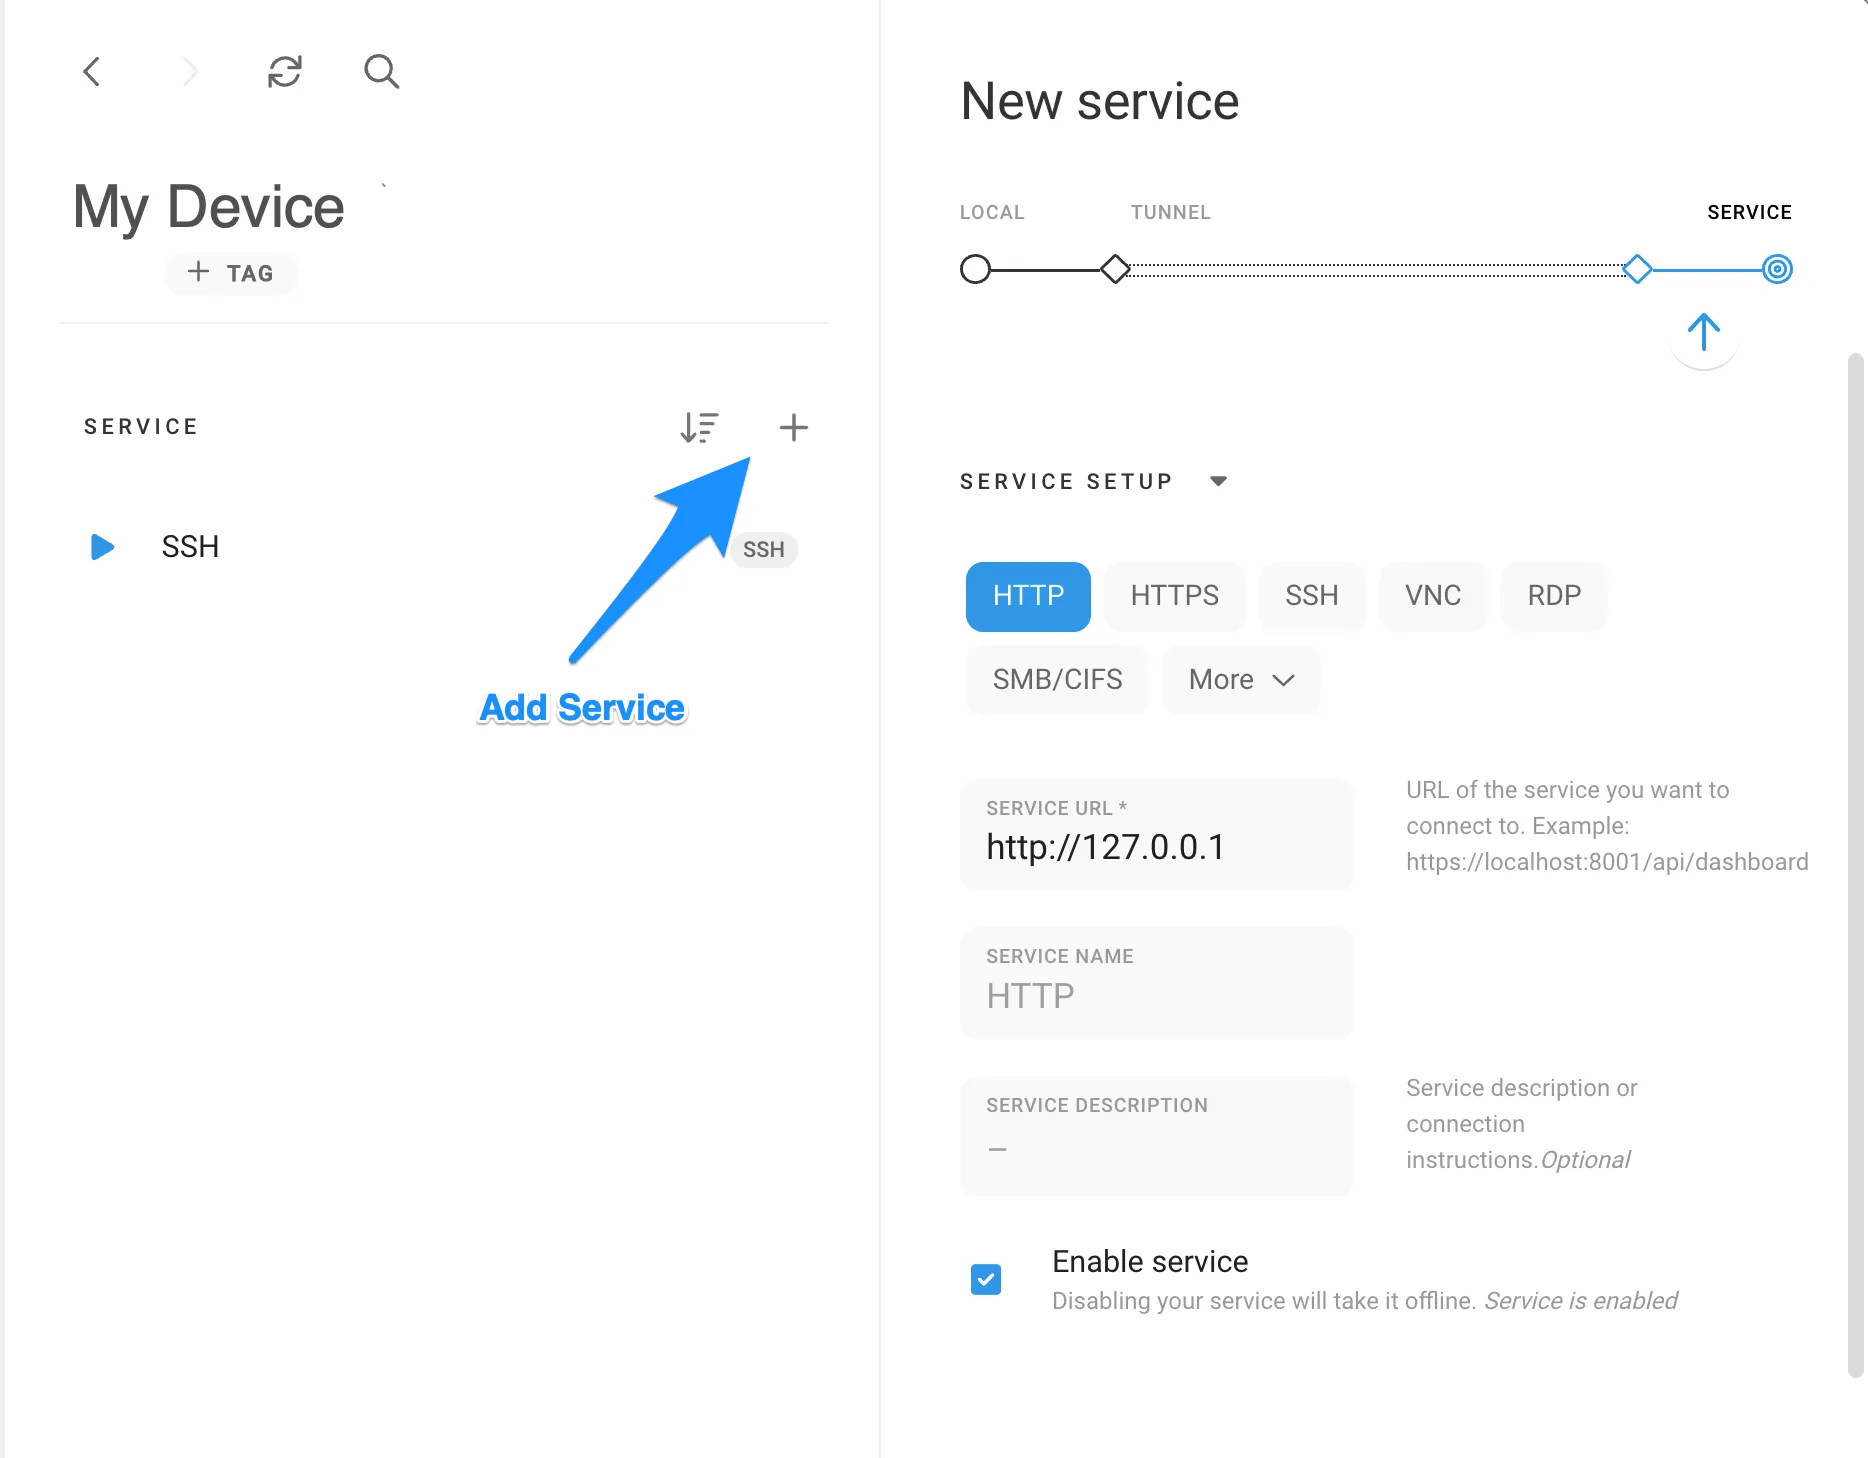
Step-by-Step Guide: How to Connect to Raspberry Pi Using Remote.it?
Now that you’ve installed remote.it on your Raspberry Pi, it’s time to learn how to connect to it remotely. This section provides a detailed walkthrough, ensuring you can establish a connection without any hassle.
What Are the Prerequisites for Remote Access?
Before you proceed, ensure you have the following prerequisites in place:
- Raspberry Pi Setup: Your Raspberry Pi should be powered on and connected to the internet.
- Remote.it Account: You need an active remote.it account linked to your Raspberry Pi.
- Device Credentials: Have your Raspberry Pi’s login credentials (username and password) handy.
Additionally, ensure that your Raspberry Pi’s firewall settings allow remote connections. If you’re unsure, you can temporarily disable the firewall for testing purposes.
What Are the Common Issues and How to Fix Them?
While remote.it is designed to be user-friendly, you may encounter some common issues during the setup or connection process. Here’s how to troubleshoot them:
- Device Not Detected: If your Raspberry Pi doesn’t appear in your remote.it dashboard, ensure that the remote.it service is running. You can restart it using the command:
sudo systemctl restart remoteit - Connection Timeout: This issue often arises due to network instability. Check your internet connection and try again.
- Authentication Errors: Double-check your login credentials and ensure they match the ones configured on your Raspberry Pi.
By addressing these issues, you can ensure a smooth and uninterrupted remote access experience.
What Are the Advantages of Using Remote.it for Raspberry Pi?
Using remote.it for remote access to your Raspberry Pi offers several advantages that make it a preferred choice for many users. Here’s a closer look at what sets it apart:
- Simplicity: The platform’s intuitive interface and straightforward setup process make it accessible to users of all skill levels.
- Security: Remote.it employs end-to-end encryption and peer-to-peer connections, ensuring your data remains secure.
- Versatility: With support for multiple protocols, you can use remote.it for a wide range of applications, from file management to IoT monitoring.
- Reliability: Unlike traditional methods that rely on port forwarding, remote.it works seamlessly across different networks and dynamic IPs.
These advantages make remote.it a powerful tool for anyone looking to maximize the potential of their Raspberry Pi.
How Secure Is Remote.it for Remote Access?
Security is a top priority when it comes to remote access, and remote.it excels in this area. The platform uses advanced encryption protocols to protect your data during transmission, ensuring that your Raspberry Pi remains safe from unauthorized access.
Additionally, remote.it’s peer-to-peer architecture eliminates the need to expose your device to the public internet, reducing the risk of cyberattacks. This approach not only enhances security but also improves connection reliability, as it bypasses potential bottlenecks caused by intermediaries.
For users concerned about privacy, remote.it offers features like two-factor authentication (2FA) and access control, allowing you to manage who can connect to your Raspberry Pi and under what conditions.
Are There Alternatives to Remote.it for Raspberry Pi?
While remote.it is an excellent choice for remote access, it’s worth exploring other alternatives to determine which tool best suits your needs. Some popular options include:
- NoMachine: A fast and reliable remote desktop solution that supports high-quality video and audio streaming.
- TeamViewer: A widely-used platform for remote access, offering cross-platform compatibility and robust security features.
- RealVNC: A versatile tool that provides remote access through a graphical user interface, ideal for managing desktop environments.
Each of these alternatives has its own strengths and limitations, so consider your specific requirements before making a decision.
What Are Some Practical Use Cases for Remote.it with Raspberry Pi?
Remote.it opens up a world of possibilities for Raspberry Pi users, enabling them to leverage their devices in innovative ways. Here are some practical use cases:
- IoT Projects: Monitor and control IoT devices remotely, making it easier to manage smart home systems or industrial applications.
- Server Management: Access and manage servers running on your Raspberry Pi, such as web servers or media servers, from anywhere in the world.
- Remote Learning: Use remote.it to facilitate remote learning environments, allowing students to access Raspberry Pi labs for educational purposes.
These use cases highlight the versatility and potential of remote.it in enhancing your Raspberry Pi experience.
Frequently Asked Questions About Remote.it and Raspberry Pi
Is Remote.it Free to Use?
Yes, remote.it offers a free tier that includes basic features, making it accessible for personal and small-scale projects. However, advanced features and higher usage limits are available through paid plans.
Can I Use Remote.it on Multiple Devices?
Absolutely! Remote.it supports multiple devices, allowing you to manage all your connected devices from a single dashboard.
Does Remote.it Work on Windows and macOS?
Yes, remote.it is compatible with Windows, macOS, and Linux, ensuring cross-platform accessibility for users.
Conclusion
Learning how to connect to Raspberry Pi using remote.it can significantly enhance your ability to interact with your device remotely. With its user-friendly interface, robust security features, and versatile applications, remote.it is an invaluable tool for anyone looking to unlock the full potential of their Raspberry Pi. By following the steps outlined in this guide, you can set up remote access with ease and enjoy the convenience it brings to your projects. So why wait? Start exploring the possibilities today and take your Raspberry Pi experience to the next level.
You Might Also Like
How Can I Control My Raspberry Pi Remotely? A Comprehensive GuideHow To Log Into Raspberry Pi Remotely: A Comprehensive Guide
What Is VNC In IoT? Exploring Its Role And Impact
Discovering The Beauty Of "Kono Koi Ni Kizuitr": A Comprehensive Guide
Mastering Remote Access: How To SSH Into Raspberry Pi Remotely
Article Recommendations